
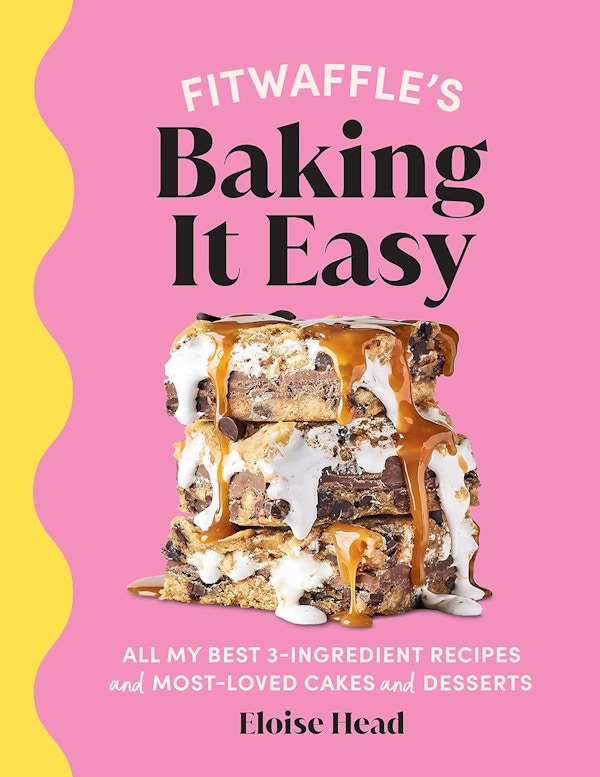
Millions of others agreed, and now, nine years after she began, she has realised another dream: the release of a much in-demand cookbook featuring her top one hundred bakes. Fitwaffle’s Baking It Easy is the first recipe book from the social media star baker and it’s already a Sunday Times bestseller. Impressive stuff – and it’s easy to see why: every recipe is a winner, not least since half of them contain just three ingredients. Near impossible task though it was, we’ve whittled down our very favourite three, which we’ve extracted here for your delectation. Ready, steady… bake!
Chocolate Crunch Cheesecake
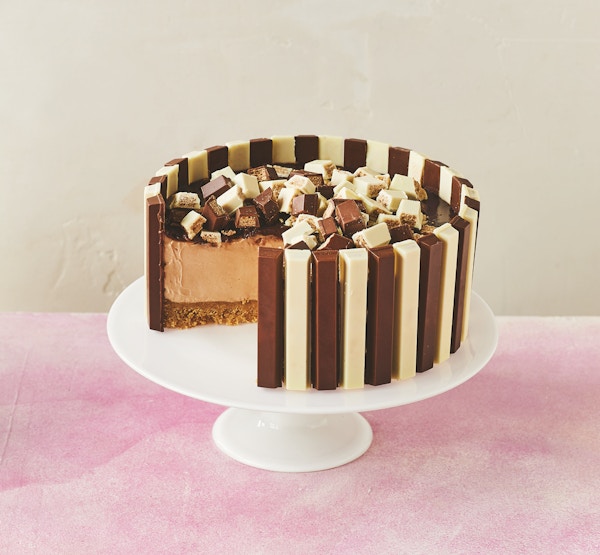
Serves 12
This cheesecake is such a showstopper and it’s one of my most popular cheesecakes on social media. It has a buttery biscuit base, a creamy chocolate cheesecake filling, topped with a rich chocolate ganache and encased in chocolate wafer fingers. Feel free to use any flavour of wafer fingers you like to make it your own.
Ingredients
For The Base
34 chocolate-covered wafer 02 fingers (you can use milk, white
or dark chocolate or a mixture; I use KitKats)
300g (10.5oz) digestive biscuits (or graham crackers)
150g (5.25oz) salted or unsalted 03 butter, melted
For The Filling:
450ml (scant 2 cups) cold double (or heavy) cream
500g (1lb) full-fat cream cheese, at room temperature
120g (1 cup) icing (powdered) sugar
200g (7oz) milk chocolate, melted
and cooled slightly 04
For The Topping:
100g (3.5oz) dark chocolate, broken into pieces
100ml (scant 1/2 cup) double (or heavy) cream
6 chocolate-covered wafer 05 fingers, broken into small pieces
Method
For The Base
Line the bottom of a 20cm (8in) round springform cake tin with a circle of nonstick baking paper.
Place the chocolate-covered wafer fingers around the inside edge of the prepared tin with the branding facing outwards. The edge of each finger should line up with the neighbouring finger. If there is a small gap at the end, carefully slice a finger in half vertically to fill the gap.
Put the biscuits into a food processor and process until finely crushed. Alternatively, put them into a plastic bag and crush with a rolling pin. Tip into a large mixing bowl, then pour in the melted butter and mix with a spoon until fully combined. Carefully scoop the mixture into the tin, making sure you don’t knock any of the chocolate-covered wafer fingers over, then press it down firmly with the back of a spoon (this will secure the wafer fingers in place). Pop into the refrigerator while you make the filling.
For The Filling
In a large mixing bowl, whip the cream with an electric hand mixer until stiff peaks form. In a separate large bowl, beat together the cream cheese and icing (powdered) sugar with the electric mixer until smooth, then pour in your melted milk chocolate and beat until just combined. Fold in the whipped cream with a rubber spatula until just combined.
Remove the chilled base from the refrigerator, then spoon in the filling, smoothing it out to the edges of the wafer fingers and pressing it down onto the base to avoid any gaps.
For The Topping
Put the chocolate pieces and cream into a microwave-safe bowl and microwave on high for 1 minute 20 seconds (the cream should be warm enough to melt the chocolate without boiling and curdling).
Leave to stand for about 2 minutes, then stir until the cream and chocolate start to come together. Continue to stir until smooth and creamy.
Pour the topping over the filling and quickly smooth it out to the edges using a metal spatula or the back of a spoon. Sprinkle the broken chocolate-covered wafer pieces evenly over the top and chill in the refrigerator for at least 6 hours, or overnight, if possible, until completely set.
Store in the refrigerator for up to 3 days.
Speculoos Millionaire’s Bars

Makes 16
A thick, buttery speculoos biscuit base, a layer of gooey homemade caramel, topped with speculoos white chocolate and a speculoos swirl. This recipe doesn’t skimp on speculoos!
Ingredients
For The Base
500g (1lb) speculoos biscuits (I use Biscoff)
200g (7oz) salted butter, melted
For The Caramel:
1 x 397g (14oz) can condensed milk
90g (6 tbsp) unsalted butter 100g
(1/2 cup) light brown sugar
1 tsp salt
15ml (1 tbsp) golden syrup
For The Topping
250g (9oz) white chocolate, broken into pieces
100g (7 tbsp) speculoos spread/ cookie butter (I use Biscoff)
+ 50g (31/2 tbsp), melted, for the swirl
Method
For The Base
Line a 20cm (8in) square baking tin with nonstick baking paper.
Put the biscuits into a food processor and process until finely crushed. Alternatively, put them into a plastic bag and crush with a rolling pin. Tip into a medium mixing bowl, then pour in the melted butter and mix with a spoon until fully combined.
Press the mixture firmly into the bottom of your prepared tin with the back of a spoon. Set aside.
For The Caramel
Put the condensed milk, butter, sugar, salt and golden syrup into a large saucepan. Stir constantly over a low–medium heat until the sugar has dissolved and everything has melted and fully combined.
Turn up the heat to medium–high and continue to stir until the mixture thickens and starts to bubble continuously.
Test if it is ready by using the ‘soft ball stage’ test – drop 1 teaspoon of caramel into a glass of very cold water. If it forms a soft ball, it’s ready. Pour the caramel over the base and smooth it out with the back of a spoon if needed. Leave to set at room temperature for at least 1 hour until completely cooled.
For The Topping
Once the caramel has cooled, put the white chocolate and speculoos spread (cookie butter) into a microwave-safe bowl and microwave on medium in 40-second bursts, stirring in between until melted and smooth.
Pour the topping over the caramel, smoothing it gently with the back of a metal spoon, then drizzle over the remaining speculoos spread and swirl it with a skewer to make a pattern.
Chill in the refrigerator for 1 hour until the topping has completely set. Cut into 16 squares and enjoy!
Store in an airtight container in the refrigerator or at room temperature for up to 5 days.
Cookie Cups
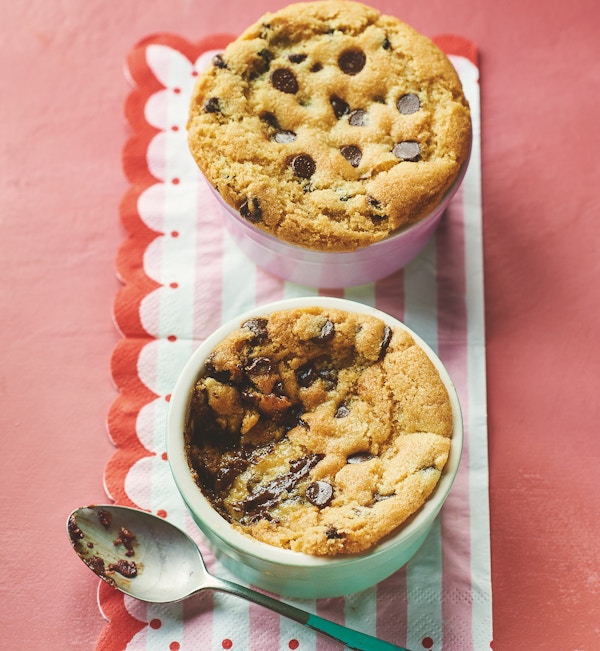
Makes 2
Sometimes you just want a soft and warm chocolate chip cookie all to yourself to eat with a spoon. These cookie cups have a crisp top and a gooey middle. They’re quick and easy to make in the air fryer and they’re ready in 20 minutes.
Ingredients
50g (31/2 tbsp) unsalted butter, softened
40g (3 tbsp) light brown sugar 20g (1 tbsp + 1 tsp) granulated sugar
1 egg yolk
1/2 tsp vanilla extract
70g (1/2 cup) plain (all-purpose) flour
1/4 tsp bicarbonate of soda (baking soda)
1/4 tsp salt
60g (41/2 tbsp) chocolate chips + extra for the top
Method
Preheat your air fryer to 160C (325F).
In a small mixing bowl, beat the butter and both sugars with a spoon to form a paste.
Add the egg yolk and vanilla extract and mix until combined, then fold in the flour, bicarbonate of soda (baking soda) and salt until just combined. Don’t overmix.
Fold in the chocolate chips, then divide the dough between 2 ramekins and sprinkle more chocolate chips on top.
Place in the centre of your air fryer and bake for 10–15 minutes (cooking times will vary between air fryers).
Leave to stand for 2 minutes, then grab a spoon and dig in. 07 Best served straight away, but you can reheat them in the air fryer for 2–3 minutes up to 1 day after baking.
To Bake In The Oven
Cook at 200C (180 C fan)/400 F/Gas mark 6 for 15–20 minutes.
Extracted from Fitwaffle’s No-Bake Baking by Eloise Head (Ebury Press, £22)
Photography by Faith Mason